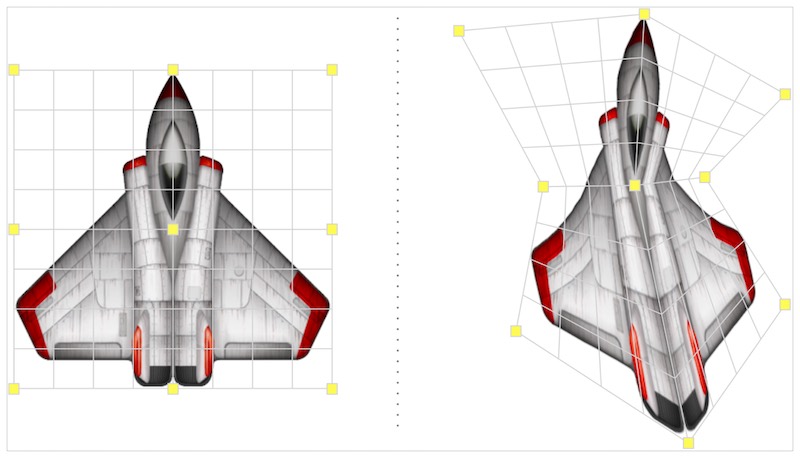
SpriteKit: Shaders & Geometry
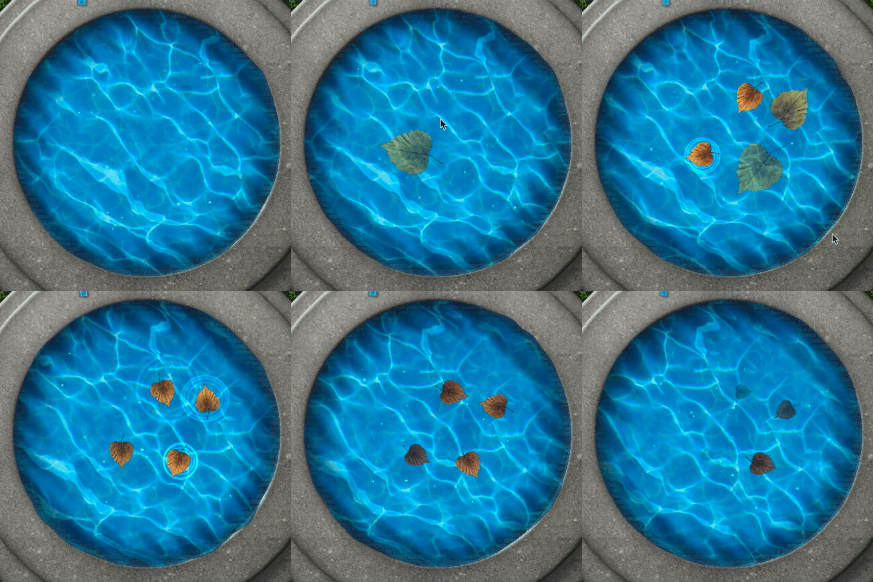
SpriteKit shader & geometry demo
Endless visual effects (and entire games) can be made using just basic SKSpriteNodes without ever needing shaders or SKWarpable. Leveraging the power of these two tools, however, opens entirely new doors for effects that couldn't be achieved in any other way. The article will introduce both SKShader and SKWarpGeometry and provide some examples of how to use them.
This post will explore how to make the pool simulation shown to the right. This demo employs a number of combined effects:
- (Shader) Ripple effect applied using a sine wave
- (Shader) Edges are darkened and faded (color subtraction also animates with its own curve)
- (Shader) Water drifts horizontally (texture wrapping)
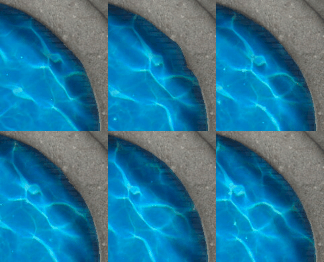
- (Geometry) Additional movement is created by randomly warping the water using SKWarpGeometryGrid, which causes the edges to lap against the pool rim
- (Particle) Sparkles are created using SKEmitterNode
- (SKAction) Leaves are animated falling into the pool
Video
SKShader
SKShader provies an easy way to use fragment shaders with your SpriteKit nodes. These shaders are essentially mini-programs written in a C-like language (OpenGL ES 2.0 Shading Language, or 'GLSL') which allows you to calculate the resulting color for each pixel in the rendered sprite.This provides tremendous power, since you can completely control how your sprite is drawn on a pixel-by-pixel basis. Although these shader programs are run for each pixel, they are executed on the GPU in a massively parallelized fashion and are thus extremely fast.
The main() Function
All shaders should have a main() function. This function can perform any calculations you like, but it must at some point set the value of gl_FragColor (a vec4, which is a data structure which can hold our RGBA values). The resulting gl_FragColor will be the color for the specific sprite pixel being computed (fragment shaders don't operate exactly on pixels per se, but it can be useful to think of them in this way).GLSL Data Structures
A deep dive of the OpenGL Shading Language is beyond the scope of this post, but the table below will provide a quick crash course on some of the fundamental data structures and functions you'll likely make use of in most basic shaders. Some familiarity with the C programming language will come in handy, since that is the language GLSL's syntax is based on.Common GLSL data structures & functions
| int | Integer value. |
| float | Floating point value. |
| vec2 | A data structure of 2 floats, frequently used to represent 2D coordinates. |
| vec4 | A data structure of 4 floats. These are typically used to represent RGBA colors, where each value is in the range of 0.0-1.0. |
| v_tex_coord | A vec2 which represents the current fragment / pixel we're calculating for. The x,y values are in normalized texture coordinates (in the range of 0.0-1.0, where 0.5, 0.5 is the 'center' of the sprite texture). |
| gl_FragColor | This vec4 must be set at some point in the shader. The value of this will be the color which is rendered for the particular fragment. |
| u_texture | This represents the texture being used to render the current node. We can get the target color of any pixel in the current texture by calling texture2D(u_texture, coord). |
| u_time | This provides the current elapsed time in the simulation. It is a uniform (its value will be consistent among all of the threads running the shader code for this sprite) which can be used to animate or modulate the shader. |
| SKDefaultShading() | As the prefix implies, this is a SpriteKit-specific function which provides the default blended color which would normally be used for this fragment. |
Basic Shader Example
Let's start by writing a very simple shader which tints our demo pool's water texture green (to create a nice algae bloom). There are just a few steps to creating this shader:- Create a new empty file with a .fsh extension for the shader code
- Write a main() function with no arguments which returns void:
void main() { } - Get the color which would have been drawn, using SKDefaultShading():
vec4 color = SKDefaultShading(); - Return a custom color with the red and blue channels zeroed out, leaving us just green:
gl_FragColor = vec4(0.0, color.g * color.a, 0.0, color.a);
void main() {
    vec4 color = SKDefaultShading();
    gl_FragColor = vec4(0.0, color.g * color.a, 0.0, color.a);
}
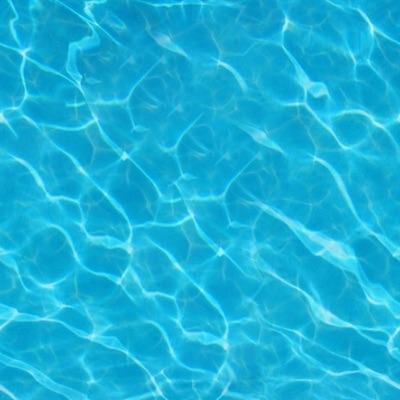
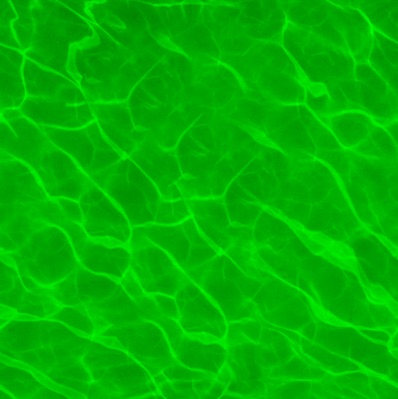
Applying the above shader to the water-textured node in the demo app results in a lovely slime-filled pool:
Water.png before shader

With shader applied

Using Shader Files with Xcode
 Using our new shader in a SpriteKit Xcode project for either iOS or macOS is as simple as putting the code in an .fsh file, adding it to the Xcode project (ensuring it is included as a resource for the target app), and then instantiating an SKShader with the file name:
let shader = SKShader(fileNamed: "myShader.fsh")
We can then set the shader property on any SKSpriteNode or SKEffectNode:
mySprite.shader = shader
Once again, SpriteKit makes things incredibly simple for us. We've just written a custom fragment shader, loaded it, and applied it to a textured sprite node in 2 lines of code.
Liquid Shader Example
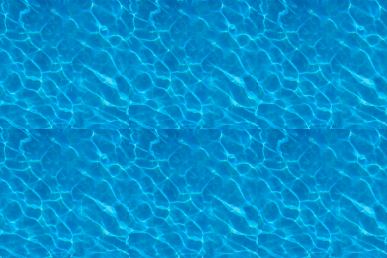 For the next step, we'll look at writing a shader which creates a ripple effect. This is far more interesting than our simple colorization shader above, but is nearly as simple.
To create it, we take advantage of the fact that our fragment shader can retrieve color values for neighboring pixels and return them for another coordinate. This can create warping effects where nearby pixels are actually shown for a given X,Y rather than the color that would be seen normally if the texture were completely 'flat'.
Creating this ripple effect is as simple as offsetting the current X,Y the shader is computing using cos() and sin() functions. We then use the adjusted coordinate to sample the texture and return a nearby color value.
In practice, the code looks like this:
vec2 coord = v_tex_coord;
coord.x += cos((coord.x + speed) * frequency) * intensity;
coord.y += sin((coord.y + speed) * frequency) * intensity;
vec4 targetPixelColor = texture2D(u_texture, coord);
gl_FragColor = targetPixelColor;
This shader is included in the pool demo project (in the file simpleLiquidShader.fsh). It uses a few predefined variables (speed, frequency, and intensity) which can be adjusted if desired to change the overall effect. The speed variable in the above code is based on u_time so that the rippling continues to change as the SpriteKit simulation progresses.
OpenGL vs. Metal
Before going any further, a quick note on OpenGL and Metal. The recent transition to Metal by Apple in iOS and macOS means that your shaders may be compiled differently depending on what hardware they are loaded on.You should always test your shaders for both OpenGL and Metal environments. You can do this by adding a PrefersOpenGL boolean key to your target's Info.plist. If this boolean is set to YES, it will force an OpenGL environment. You may find that certain GLSL syntax is valid in one but not the other, or you may observe rendering differences between the two, so it's important to test your shaders in both.

You can also use the debugDrawStats_SKContextType defaults key to display the current renderer in the bottom-right corner of your SKView. Example:
var skDefaultsDictionary = [String: Any]()
skDefaultsDictionary["debugDrawStats_SKContextType"] = true
UserDefaults.standard.set(skDefaultsDictionary, forKey: "SKDefaults")
Uniforms & Attributes
Uniforms and attributes can be leveraged within your shaders to provide additional flexibility in your fragment calculations. These won't be covered in this post, but you can learn more about them from Apple's documentation for SKUniform and SKAttribute. Be sure to also check out the 'Further Reading' section of links at the bottom.Shaders: Putting Things Together
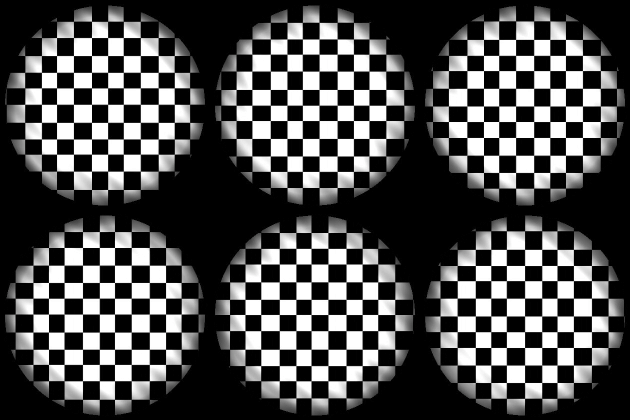
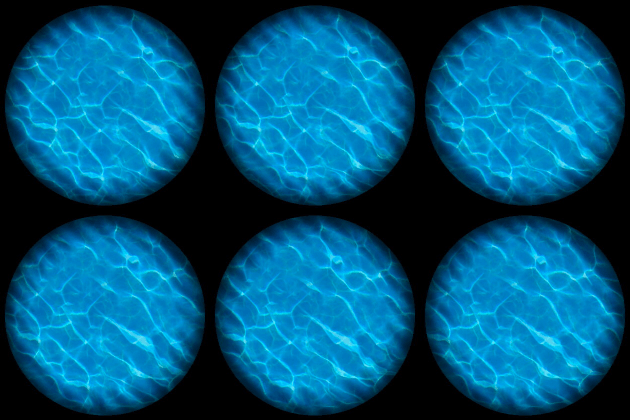
In the above examples we've seen how we can colorize or deform a sprite's appearance using simple calculations in our custom fragment shaders. The shader used for the pool simulation combines a number of different adjustments all together, but even though it's doing more calculating, the basic operations are no different than what has been shown so far.The poolWaterShader.fsh in the demo app does the following:
- Applies a ripple effect like the shader above
- Further adjusts the X offset to create a scrolling / wrapping effect, for drift
- Calculates the distance for the current pixel from the center of our texture (0.5, 0.5)
- If distance is > 0.5, immediately returns a clear color (this effectively alpha-masks our texture to be a perfect circle contained inside our previously square-shaped sprite)
- If within a given threshold, darkens and fades the edges of the water texture, again using cos() / sin()
poolWaterShader.fsh applied to a checkerboard

...and applied to the demo's water.png texture

Geometry
So far using custom shaders has added some nice effects to our pool simulation. But for fun, let's take it a step further. This section will discuss using SKWarpGeometryGrid to further deform the water node. This will add additional movement, and will result in the edges of the water appearing to lap against the pool rim.SKWarpable & SKWarpGeometry
SKWarpable is the protocol which nodes can conform to if they support custom geometry. Currently SKSpriteNode and SKEffectNode both support SKWarpable. For practical purposes you can warp just about any node, since you can add e.g. an SKLabelNode as a child of an effect node and apply your custom warping geometry to the parent.SKWarpGeometry is a base superclass from which concrete subclasses like SKWarpGeometryGrid inherit. Our pool simulation uses SKWarpGeometryGrid to create the deformation of the water.
SKWarpGeometry Basics
The basic premise of deformation with custom geometry is to define a series of points on a given node which are then shifted to new arbitrary positions. SpriteKit can interpolate between the source and destination points with SKAction.warp(to:,duration:), and warp the node's appearance to fit the new shape, allowing animations to create the appearance of the node morphing between the two positions.SKWarpGeometryGrid makes this particularly easy by defining a grid of points for the deformation. The point values are normalized, similar to our shader texture coordinates, falling in the range of 0.0-1.0. When creating arrays of points (of type float2) to use with SKWarpGeometryGrid, the first point in the array will correspond to the bottom-left of the sprite. For the pool demo, the warping does the following:
- Creates the non-deformed starting source points with a generic grid
- Periodically creates a new geometry grid, randomizes the interior points slightly, and animates the water node to fit it
let sourcePoints: [float2] = [float2(0.0, 0.0), float2(1.0, 0.0),
                              float2(0.0, 1.0), float2(1.0, 1.0)]
let destinationPoints: [float2] = [float2(0.0, 0.0), float2(1.0, 0.0),
                                   float2(0.4, 1.0), float2(0.6, 1.0)]
let defaultGeometry = SKWarpGeometryGrid(columns: 1, rows: 1)
myNode.warpGeometry = defaultGeometry
let newGeometry = SKWarpGeometryGrid(columns: 1, rows: 1,
                                     sourcePositions: sourcePoints,
                                     destinationPositions: destinationPoints)
myNode.run(SKAction.warp(to: newGeometry, duration: 1.0)!)
Randomized Geometry
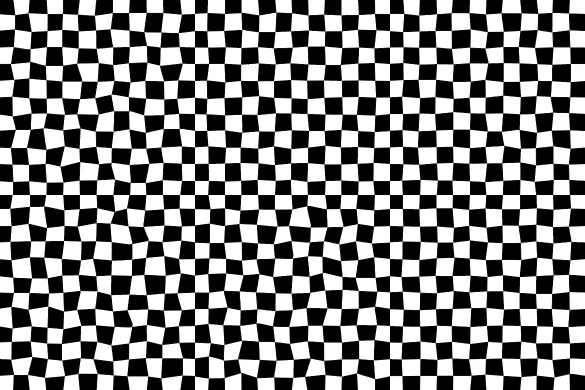
The example code above is fairly basic, defining the 4 corner points needed for a grid consisting of only a single row and column. In our pool simulation we programmatically create the grid points based on our desired resolution (in this case it uses a hardcoded column / row size of 12, which means 13 x 13 = 169 points are ultimately created for the grid).Each time we run a new geometry animation, we recreate this array of points, but we slightly offset the interior points with a randomized value. When this randomized warping is applied to a checkerboard texture we get the image below. When it's applied to our water, we get some additional movement which adds a nice effect. Notice also that the new addition of the geometry deformation creates the appearance of the water edges moving against the pool rim.
Our geometry deformation applied to a checkerboard

Close-up of warping water edges

More Fun with Particles & SKAction
Some extra effects were added to the pool demo for fun: an SKEmitterNode is used to simulate randomized 'light sparkles' on the surface of the water. The leaves which fall when the user clicks the pool are animated with a series of SKActions. There's nothing particularly special about these actions aside from how multiple groups and sequences are chained to create a more complex effect.To see exactly how these animations are created check out the dropLeaf(at:) and createRipple(at:) functions in PoolScene.swift. For more information on SKEmitterNode check out Apple's documentation on the class.
Summing Up
Fragment shaders can be easily leveraged in SpriteKit for both iOS and macOS using SKShader, and provide powerful control over how your sprite nodes are rendered. The OpenGL Shading Language is powerful and flexible, and additional links for reading can be found below. SKWarpable and the related classes like SKWarpGeometryGrid provide the ability to create an endless variety of deformations, and can be easily animated with SKAction.warp(to:, duration:).If you have any questions or if you're currently building something with SpriteKit, as usual, please feel free to get in touch. I'd love to see what you're making! Thanks for stopping by.
Further Reading
SKShader Docs: https://developer.apple.com/documentation/spritekit/skshaderSKWarpable: https://developer.apple.com/documentation/spritekit/skwarpable
GLSL Overview: https://www.khronos.org/opengl/wiki/Core_Language_(GLSL)
OpenGL ES Homepage: https://www.khronos.org/opengles/
OpenGL ES 2.0 Reference: https://www.khronos.org/registry/OpenGL-Refpages/es2.0/
The Book of Shaders: https://thebookofshaders.com/01/
